


Graham Quince
-
Posts
2,048 -
Joined
-
Last visited
Posts posted by Graham Quince
-
-
The Leaderboards in FrogPlay are a really simple way to drive engagement, but are often overlooked.
Here's a guide about what they show: https://www.frogeducation.com/community/training-play/mini-guides-1/play-leaderboards
And yes, you can share the leaderboards in your school. You'll need to contact the service desk for the school code, but when you do, you'll be provided with a web address similar to this:
https://www.frogplay.net/leaderboards?id=concept
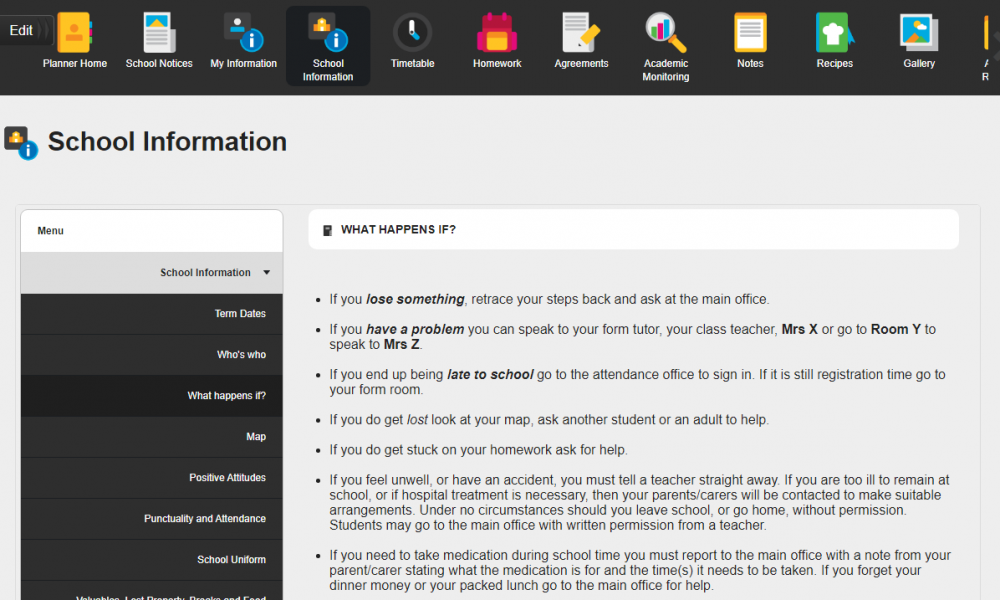
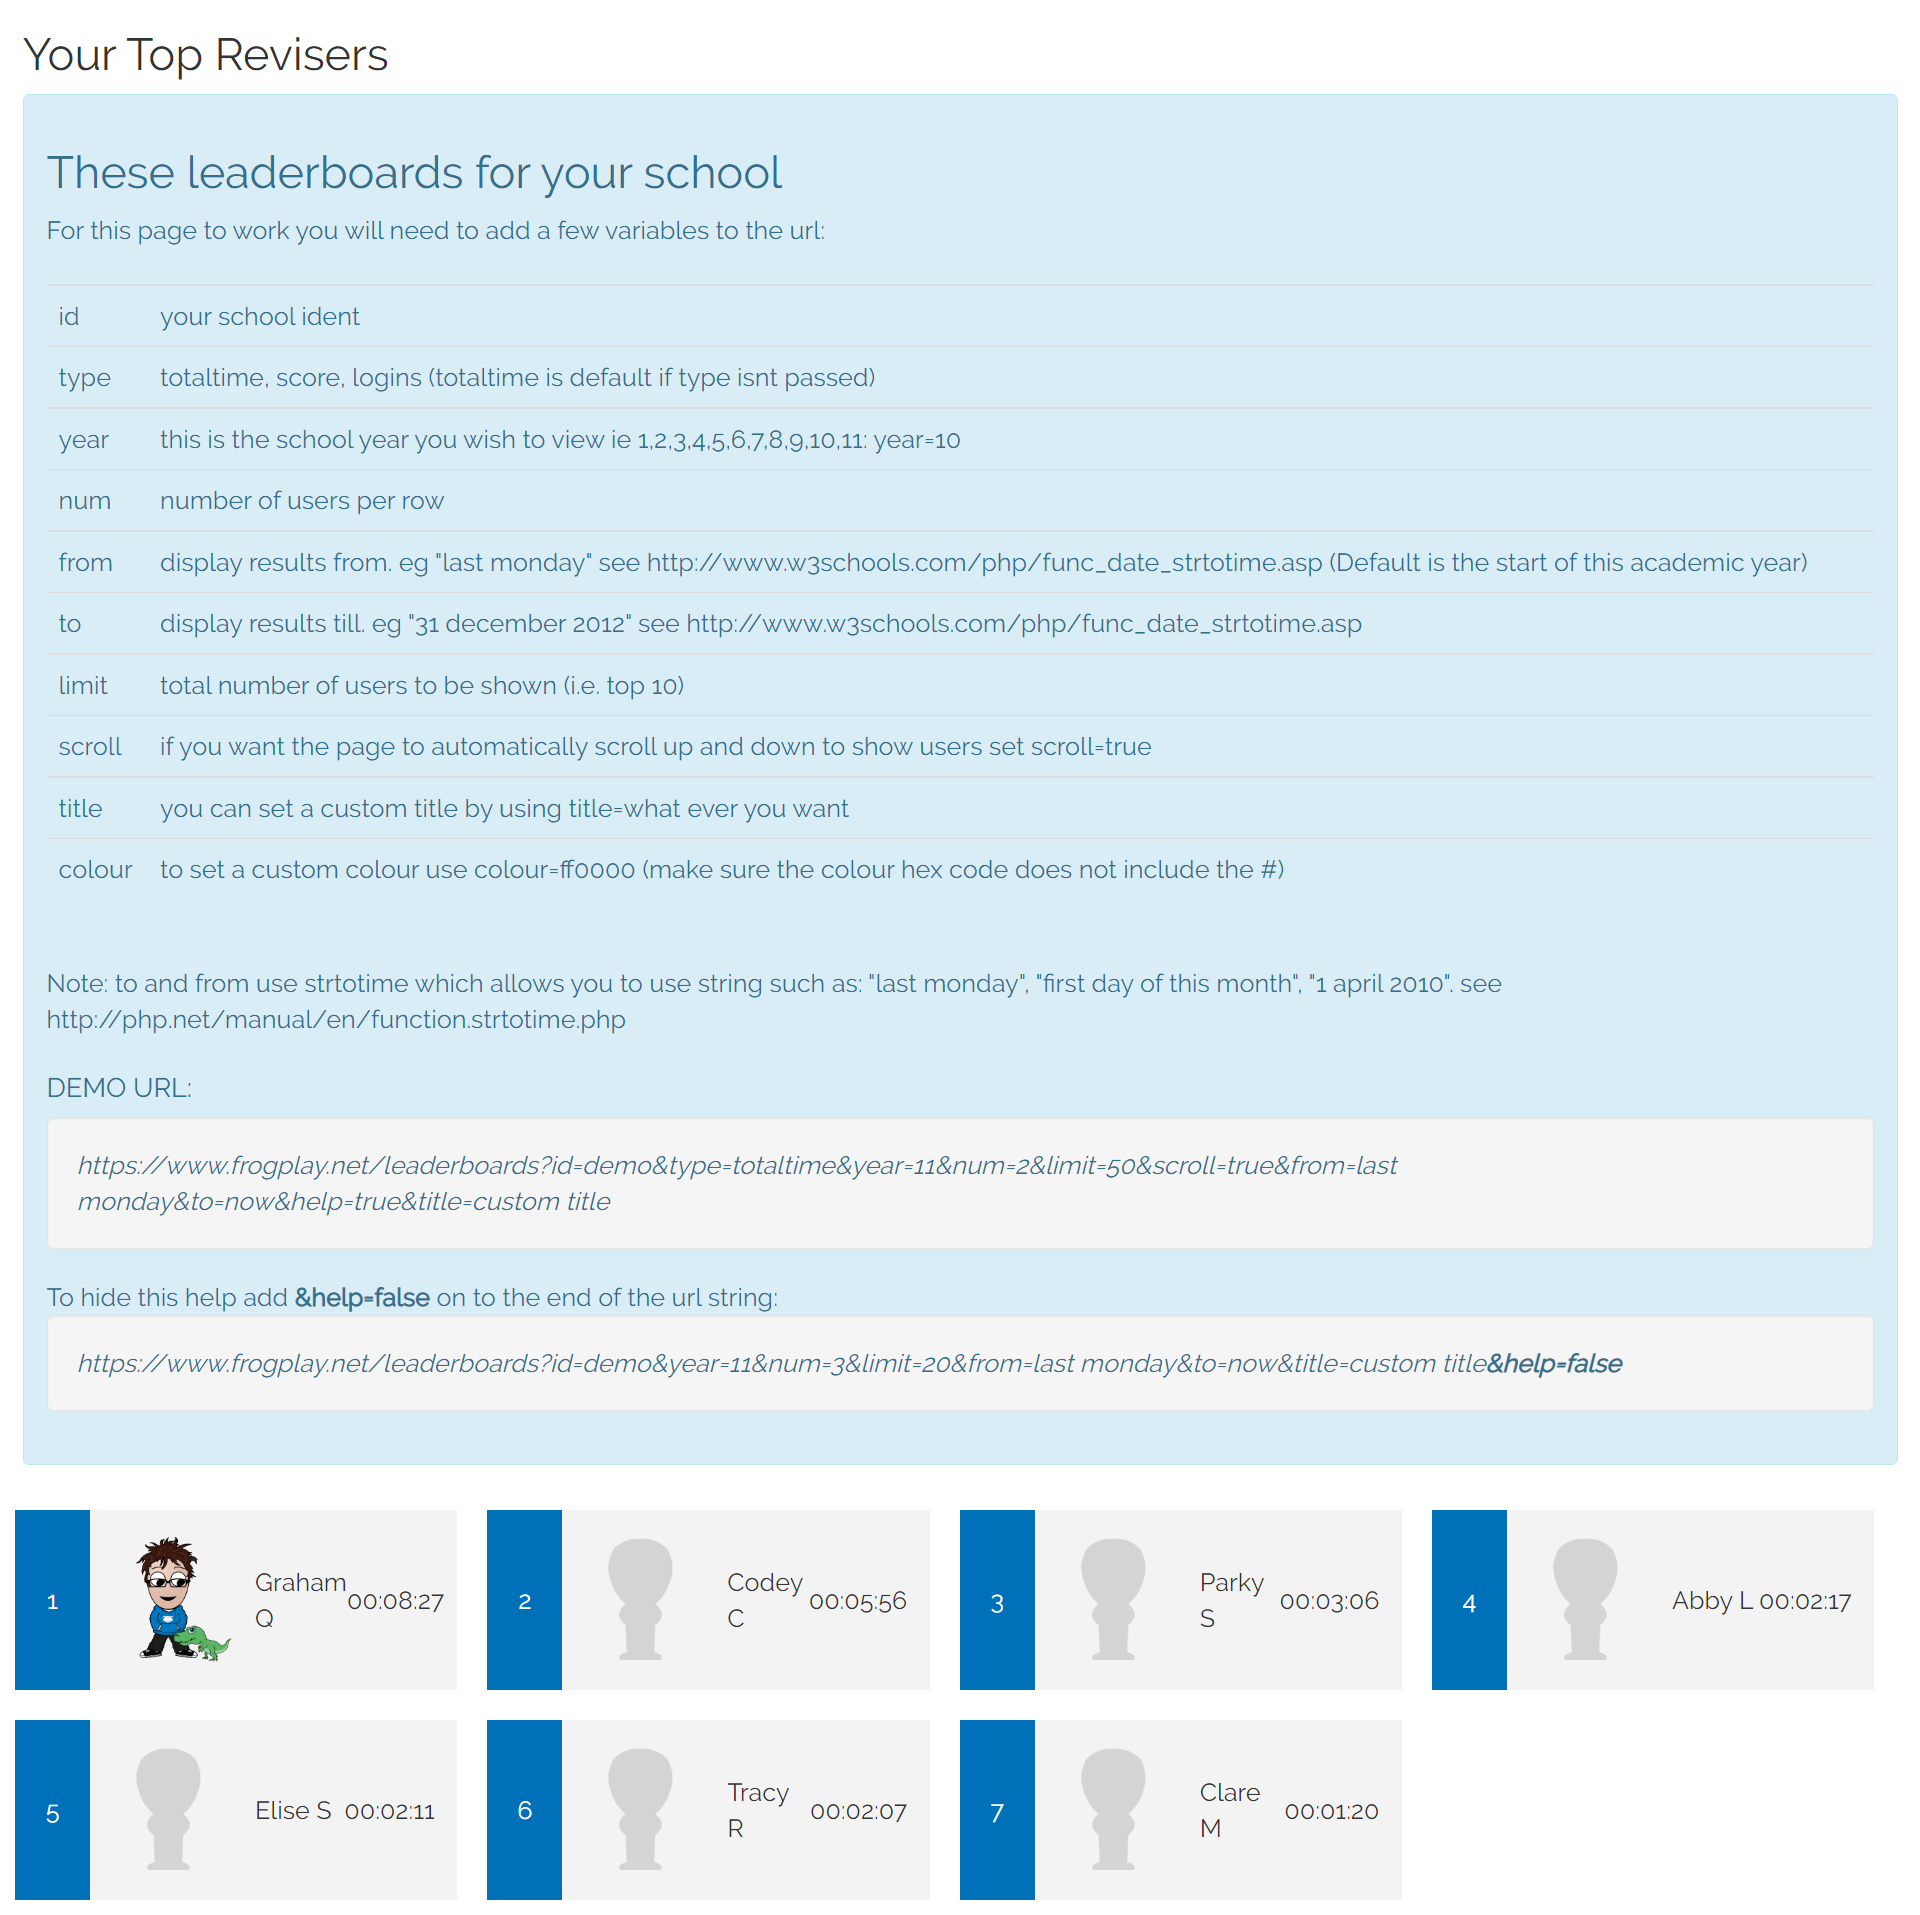
This page initially displays a list of all the commands you can send to the leaderboard. Schools running fixed time competitions can use the from and to dates to control the scores displayed.
-
I've had a school enquiring about how to display the day number for their timetable (they're looking at operating a 10 day calendar, but wanted to make sure that bank holidays etc didn't disrupt the schedule.
I thought about trying to automate the whole thing, but then there's always exceptions, so instead I've prepared a spreadsheet which can be adapted.
There's code on the DayNo column to identify weekends:
=IF(OR(WEEKDAY(A12)=7,WEEKDAY(A12)=1),"Weekend","")
and a second sheet which generates the Javascript Object:
="'"&TEXT('Dates and Day No'!A2,"DD/MM/YYYY")&"':'"&'Dates and Day No'!B2&IF('Dates and Day No'!C2<>""," - "&'Dates and Day No'!C2,"")&"',"
Which displays the date in date format (Excel likes to convert this to numbers and then displays the corresponding day and any message, to look something like this:
'06/09/2021':'4 - National Coding Week'
You can then copy the whole second sheet into this code on an HTML widget:
<style>
    .DatesDaysTable {
        font-size: 19px;
        border: 1px solid #CCCCCC;
        text-align: center;
    }
     .DatesDaysTable td,
     .DatesDaysTable th {
        padding: 10px;
        border: 1px solid #CCCCCC;
    }
</style>

<table class="DatesDaysTable">
<tr>
<th>Day No.</th>
</tr>

</table>

<script>

var Dates_Days = {
    //// PASTE IN HERE


    /// TO HERE
   /// DELETE LAST COMMA !!
},
today = moment().format('DD/MM/YYYY'),
thisHTML = arguments[0];

if (Dates_Days[today]) {
    thisHTML.find('.DatesDaysTable').append(
        '<tr>'+
        '<td>'+Dates_Days[today]+'</td>'+
        '</tr>'
    );
}
</script>
The variable today uses in the included moment.js to get today's date in the matching format.
thisHTML = arguments[0] targets the HTML widget the code is in.
And then it is a simple case to display the appropriate information for the current date.
-
Teachers can see student calendars via the MyClass application currently
-
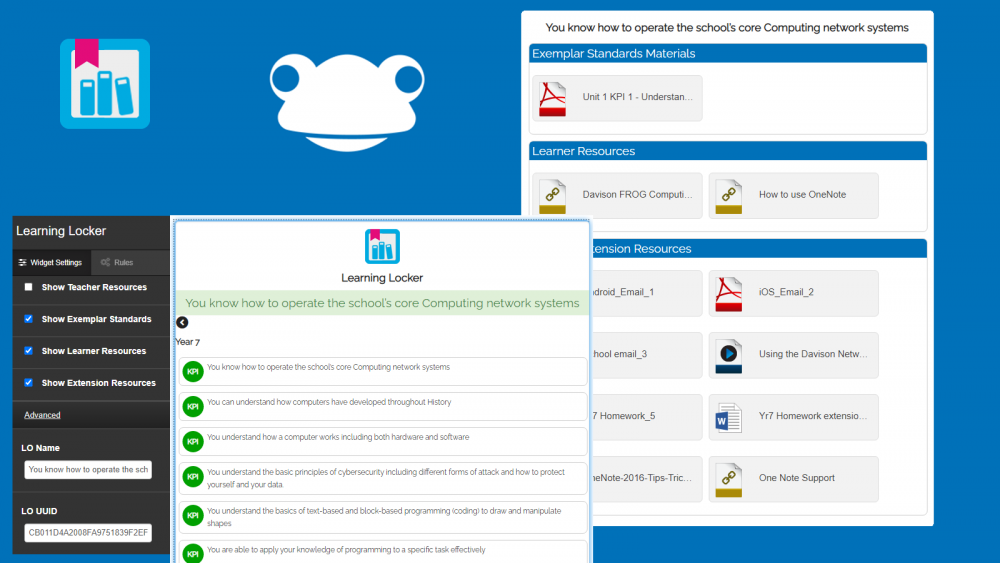
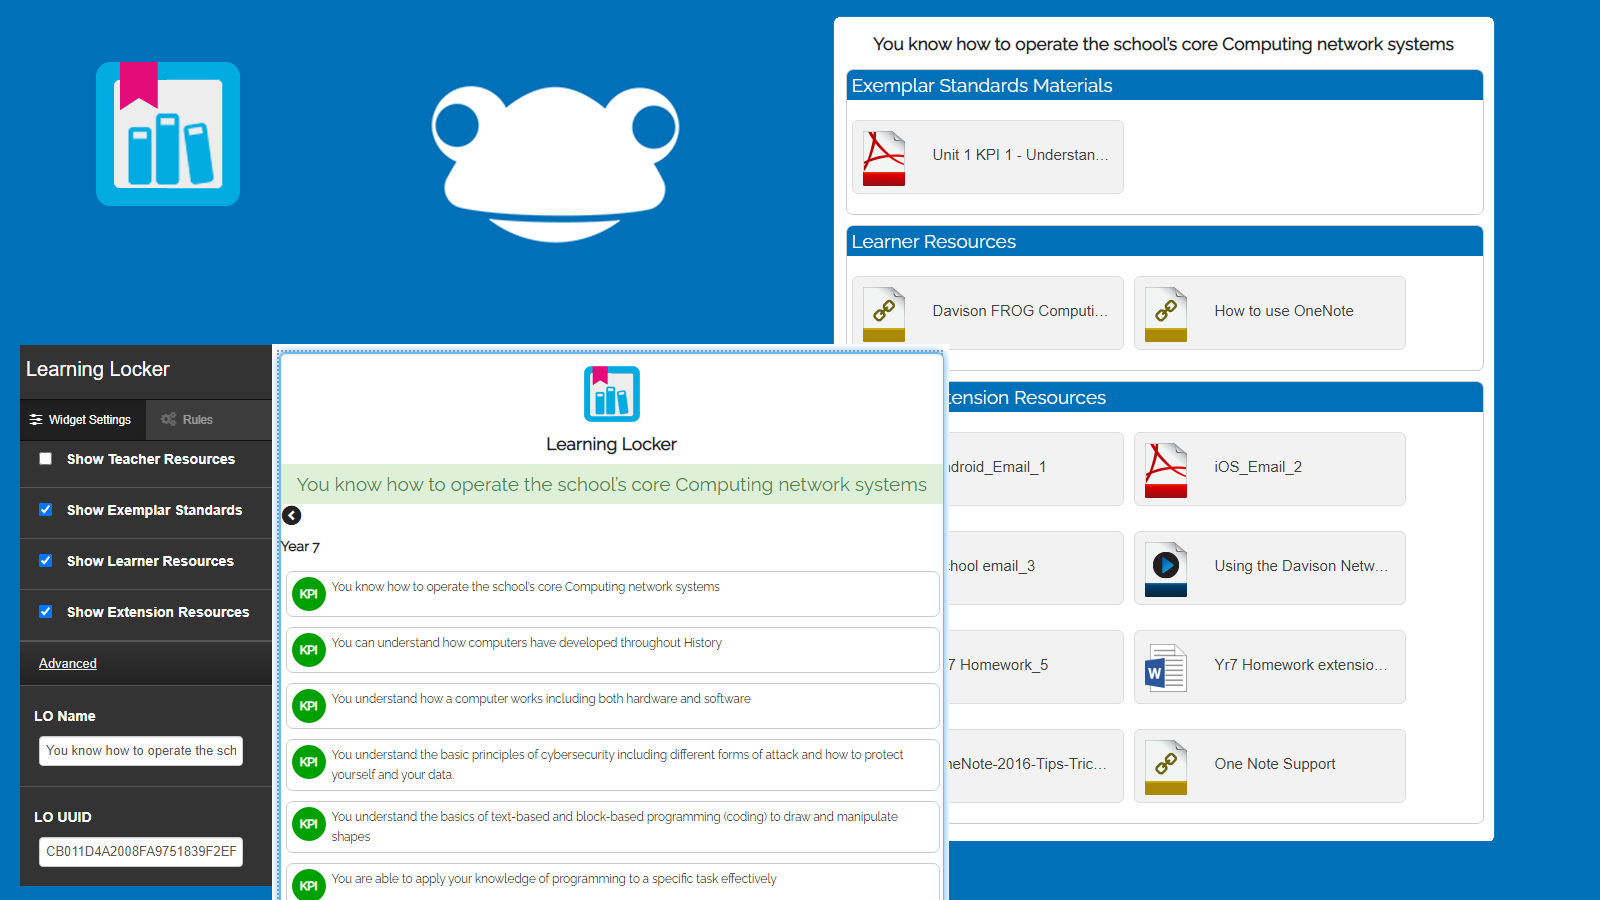
Realised I haven't shared this widget properly. It's available to download from the Community:
https://www.frogeducation.com/community/frogcode/frogcode-showcase/learninglocker
Called Learning Locker, it enables you to place the resources in a Learning Locker directly onto a page in Learn.
-
I don't have an ETA yet, but I believe the forms fix is currently being checked/worked on.
-
Got to thank @Keith Pearey for this one really. He needed a way to let everyone know about some major access issues
You can include pictures, links and embed videos as well as change the style of the text. The widget does not take up any space when viewing a site, it only shows up when editing. On opening a site, the modal is triggered immediately.
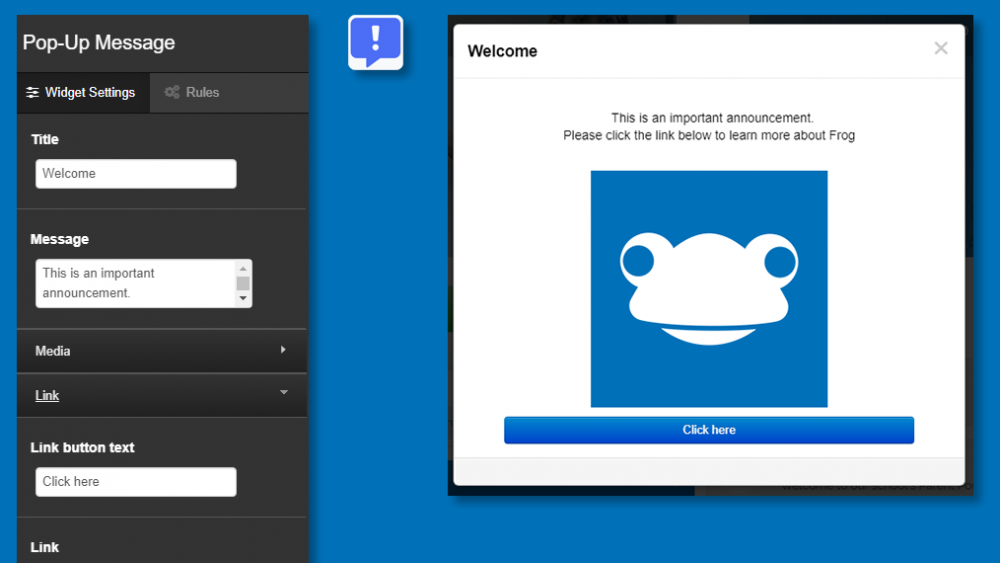
You can download: https://www.frogeducation.com/community/frogcode/frogcode-showcase/popup
-
Hi @Chay
That's true for the Folder setting, but it also works with the site's timeline. I've edit the site so that the image carousel points to the timeline and only shows images tagged with "frontpage". I've then made a second page with another image carousel, also set to only show frontpage images, but left the upload button visible - so that as an admin, you have an easy way to add images, and the image carousel widget will tag them for you automatically.
Graham
-
3 hours ago, Chay said:
Good morning,
I'm trying to put a gif in my website, it works great on desktop/laptop but doesn't seem to display at all on my phone. Does anyone have any idea why this may be happening? Heres a test link www.abrahammoss.manchester.sch.uk/giftest
Thanks in advance
Chay
Looks like it might be a common problem with iPhones and gifs. However looking at what you're trying to achieve, the Image Carousel widget should sort that for you:
https://www.frogeducation.com/community/training/widgetguides/g-m/image-carousel
-
There's also the House Points widget, but I think @ADT is probably right with the Polls:
Guide to Polls widget: https://www.frogeducation.com/community/training/widgetguides/n-q/poll
Link to the Frogcode widget: https://www.frogeducation.com/community/frogcode/frogcode-showcase/housepoints
-
7 hours ago, ADT said:
Do they still not trust you? ?
If anything, they are clamping down harder on me
-
If you want t go further, and have DIVs scroll horizontally across the screen, then this code can help:
The benefit of being DIVs, is you can additional HTML inside each DIV, including images and links.

<style>
    .ticker {
        border: 1px solid #000000;
        width: 100%;
    	height: 200px;
        overflow: hidden;
    }
    .scrolling {
        animation: marquee 20s linear infinite;
    }
    .tickeritem {
        height: 165px;
        width: 200px;
        float: left;
        background: #EBEBEB;
        font-size: 14px;
        line-height: 19px;
        margin: 5px;
        border-radius: 10px;
        border: 1px solid #cccccc;
        padding: 10px;
    }

@keyframes marquee {
  0% { transform: translate3d(0, 0, 0); }
  100% { transform: translate3d(calc(232px * -6), 0, 0); }
</style>

<div class="ticker">
    <div class="scrolling">
        <div class="tickeritem" ><a href="https://google.co.uk" target="_new"> #1 goes here</a></div>
        <div class="tickeritem">#2 goes here</div>
        <div class="tickeritem">#3 goes here</div>
        <div class="tickeritem" >#4 goes here</div>
        <div class="tickeritem">#5 goes here</div>
        <div class="tickeritem">#6 goes here</div>
    </div>
</div>


<script>
var htmlWidget = arguments[0],
    scrolling = arguments[0].find('.scrolling'),
    scrollingDivs = arguments[0].find('.tickeritem'),
    numItems = scrollingDivs.length,
    gap = 32,
    divWidth = scrollingDivs.width(),
    scrollingWidth = numItems*(divWidth+gap)*2;


    scrolling.css('width',scrollingWidth+'px');
    scrollingDivs.clone().appendTo(scrolling);

</script>
Notes:
The animation is a little finicky:
- The scrolling box needs to be wide enough to take each item plus padding, margins, borders etc... I gave up getting Javascript to calculate it and just plugged in the number which worked. For 6 items, 200px wide with the CSS I've set, that number was 32.
- This line in the style tag makes it all work: 100% { transform: translate3d(calc(232px * -6), 0, 0); } - 6 is the number of items, and 232 is the item width plus the 32 mentioned above. If you have 5 items, you need to adjust the accordingly etc...
- The script duplicates all the DIV items and sets the width based on the number of DIV items. The duplication is needed because the CSS Transform runs the whole original set of items from one side of the screen to the other before starting again. This duplication makes it looks like a continuous loop. Comment out the ticker's overflow to see what's really happening.
-
1 hour ago, ADT said:
I thought you were turning this into a widget..... ?
Do you have any idea the hoops I have to jump through these days to get widget code approved ?
-
A slightly different version, this code mimics the Assignments Menu in the Frog Bar
<style>
    .row-template {
        display: none;
    }
.assignment-widget-header {
background-color: #231f20;
padding: 1em;
position: relative;
text-align: left;
}
.assignment-widget-header::after {
content: "";
width: 98%;
height: 60%;
position: absolute;
top: 3%;
left: 1%;
border-radius: 5px;
}
.assignment-widget-header h1 {
color: #fff;
font-size: 20px;
margin: 0;
}
.no-homework {
padding: 1em;
text-align: center;
}
.assignment-list {
list-style: none;
padding: 0 1em;
margin:0 0 0 0;
}


.assignment-list :hover{
background-color:#ededed;
}

.assignment-list .assignment-link {
border-bottom: 1px solid #ddd;
padding: 10px 10px  10px 10px;
margin: 0.5em 0;
cursor: pointer;
}

.assignment-list .assignment-link p {
margin: 0;
}
.assignment-list .assignment-link .assign-icon {
width: 32px;
height: 32px;
display: block;
float: left;
margin-top: 2px;
background: url(data:image/jpeg;base64,/9j/4AAQSkZJRgABAQEAYABgAAD/2wBDAAMCAgMCAgMDAwMEAwMEBQgFBQQEBQoHBwYIDAoMDAsKCwsNDhIQDQ4RDgsLEBYQERMUFRUVDA8XGBYUGBIUFRT/2wBDAQMEBAUEBQkFBQkUDQsNFBQUFBQUFBQUFBQUFBQUFBQUFBQUFBQUFBQUFBQUFBQUFBQUFBQUFBQUFBQUFBQUFBT/wAARCAAgACADASIAAhEBAxEB/8QAHwAAAQUBAQEBAQEAAAAAAAAAAAECAwQFBgcICQoL/8QAtRAAAgEDAwIEAwUFBAQAAAF9AQIDAAQRBRIhMUEGE1FhByJxFDKBkaEII0KxwRVS0fAkM2JyggkKFhcYGRolJicoKSo0NTY3ODk6Q0RFRkdISUpTVFVWV1hZWmNkZWZnaGlqc3R1dnd4eXqDhIWGh4iJipKTlJWWl5iZmqKjpKWmp6ipqrKztLW2t7i5usLDxMXGx8jJytLT1NXW19jZ2uHi4+Tl5ufo6erx8vP09fb3+Pn6/8QAHwEAAwEBAQEBAQEBAQAAAAAAAAECAwQFBgcICQoL/8QAtREAAgECBAQDBAcFBAQAAQJ3AAECAxEEBSExBhJBUQdhcRMiMoEIFEKRobHBCSMzUvAVYnLRChYkNOEl8RcYGRomJygpKjU2Nzg5OkNERUZHSElKU1RVVldYWVpjZGVmZ2hpanN0dXZ3eHl6goOEhYaHiImKkpOUlZaXmJmaoqOkpaanqKmqsrO0tba3uLm6wsPExcbHyMnK0tPU1dbX2Nna4uPk5ebn6Onq8vP09fb3+Pn6/9oADAMBAAIRAxEAPwDtfAvgzxT8eoW8W6j4l1meW+1Gb+0JYvEE9rFp0PmSYIhSRQkKJGQPU8euNH4N/DrQPFXxs8a6Hea54t8R+GdI8PrqVkLXxBqEcs7/AGmVCy7ZgzFkQKFJwTyBzXk/w/8AAvjDXtA05NG8W6nZQ6rPLYR2dtpsTxEtcOfJMh+8CVL4bsCegr0n4D/DPx1p/wC0B4w0WD4nz+GdU0vw7E15qaaXZzKY1upB5ZDAoFUgtuGDzg9K+TwdWUsY1zN6vvbytpY8LDzlLEWu3q+//DHRLqHwyYA/8Kn/AGgf+/8Aq/8A8l1p3Z0rwp4Hi+JXgKw+JHgjVNF8Q6fYTaf4zvb1o9SguJ4opEaC4lkDJtl4YYIZa7b7Vq3/AEeFpP8A4B6NXGfHDQ/E198KW1g/HiP4kaFa67pMVzp9pp1gImc30G0NLANylSytjPOOeDX1R7p4f8L/AI1eOfAPgxtL8P8Ah3WJrK6M6C5gltiu4zSDzYA0gZHwSmcZx26EdX+zh488QaD8aPEzQfCjxB4imuPDUVnc6PHPZiVY/tUu55PNlClWJZduScg5GOaZ4D+IWj/A2zufDXjXwu6eKtFvZprNru0nG2YSyeW5KqRLbkOJFwfvD8RqfAr45eGNM+OHjLxH4p8T3FjFrXhuO0/taGynVvtJuZWYIBEdrKrKRxjp1r5XB05Rxl5Rf2v5rLXz018jwsPFrEarv30/T7j1UabonT/hiuT/AMAtC/8Aj1ct8ZPEFxpfwnfQdN/Z+1L4X6Pe69pM9zfxjTYrZZFvoMM6W8pYs21UB2nqM4FKPEnwz/6Oo+Kf/fw//INTa94h8P8AjjwHB8OPA/j3xb8WfEWteIdNu/P12GR/7Ot4LiKWV3l8iNUiCxHrklnGK+qPdP/Z) no-repeat;
}

.assignment-list .assignment-link .assign-details {
padding: 0 1em;
float: left;
}

    .list-header {
        width: 100%;
        height:50px;
        line-height:50px;
        vertical-align:top;
        padding-left: 20px;
        box-sizing: border-box;
        background-color: #0497da;
        border-top-left-radius: 6px;
        border-top-right-radius: 6px;
        border: 1px solid #cccccc;
        border-bottom-width: 0;
        color: #ffffff;
        font-size:12pt;

    background: #0497da; /* Old browsers */
    background: -moz-linear-gradient(top,  #0497da 0%, #0064cd 100%); /* FF3.6-15 */
    background: -webkit-linear-gradient(top,  #0497da 0%,#0064cd 100%); /* Chrome10-25,Safari5.1-6 */
    background: linear-gradient(to bottom,  #0497da 0%,#0064cd 100%); /* W3C, IE10+, FF16+, Chrome26+, Opera12+, Safari7+ */
    filter: progid:DXImageTransform.Microsoft.gradient( startColorstr='#0497da', endColorstr='#0064cd',GradientType=0 ); /* IE6-9 */


    }
    .list-body {
        background-color: white;
        border-bottom-left-radius: 6px;
        border-bottom-right-radius: 6px;
        border: 1px solid #cccccc;
        border-top-width: 0;
    }
</style>
<div class="Assignments"></div>


<script>
var getHTMLElem = this.element.find('.Assignments');
var getAssignments = function(child) {
    var assignments = FrogOS.fdp({
        url: 'assignment/getAssigned',
        data: {
            status: 'open',
            is_completed: false,
            limit: 15,
            order: 'start desc',
            assigned_user: child.uuid
        }
    });

    assignments.done(function(data) {
       var assignments = data.response.assignments,
           assignment,
           user_info;

        for (var uuid in assignments) {
        	if (assignments.hasOwnProperty(uuid)) {
		        assignment = assignments[uuid].assignment;
                user_info = assignments[uuid].user_info;

                getHTMLElem.find('.assignment-list'+child.uuid).show();

                var assignSubject = '<p><strong>' + assignment.subject.name + '</strong></p>';
                var assignTitle = '<p>' + assignment.name + '</p>';
                var assignEnd = '<span style="color: red;"><strong>Due: ' + moment(assignment.end, 'X').format('Do MMM YYYY') + '</strong></span>';
                var assignLink = assignment.link;
                var activity = ' | Activities done: <b>'+assignments[uuid].activities.complete+' / '+assignments[uuid].activities.total+'</b>';

                var status = ' | Status: ';
                switch(assignments[uuid].user_info.status) {
                    case 'notdone':
                        status = status+' Not done';
                        break;
                    case 'ontime':
                        status = status+' Handed in';
                        break;
                    case 'late':
                        status = status+' Late';
                        break;
                    default:
                        break;
                }

                var liElem = '<li class="assignment-link clearfix" data-assignment-link="' + assignLink + '"><div class="assign-icon"></div>'+
                             '<div class="assign-details">' + assignSubject + '' + assignTitle + '' + assignEnd + activity + status +'</div></li>';


                if (user_info.completed == null) {
                    getHTMLElem.find('.assignment-list'+child.uuid).append(liElem);
                }
                //getHTMLElem.find('.assignment-list'+child.uuid).append(liElem);

            }
        }
    });
};

$(getHTMLElem).on('click', '.assignment-link', function(el){
    $(this).trigger('os.app.siteviewer', {
        data: { site: el.currentTarget.dataset.assignmentLink }
    });
});

Frog.Model.api('users.getChildren').done(function(listResponse) {
        var children = listResponse.data;
        $.each(children, function(index,child) {
            getHTMLElem.append(
                '<div class="list">'+
                "<div class='list-header'>"+child.displayname+"'s recent homeworks</div>"+
                '<div class="list-body">'+
                '<ul class="assignment-list assignment-list'+child.uuid+'" style="display: none;"></ul>'+
                '</div><hr>'
            );
            getAssignments(child);
       });
});

</script>
-
17 hours ago, Chay said:
Hi Adrian,
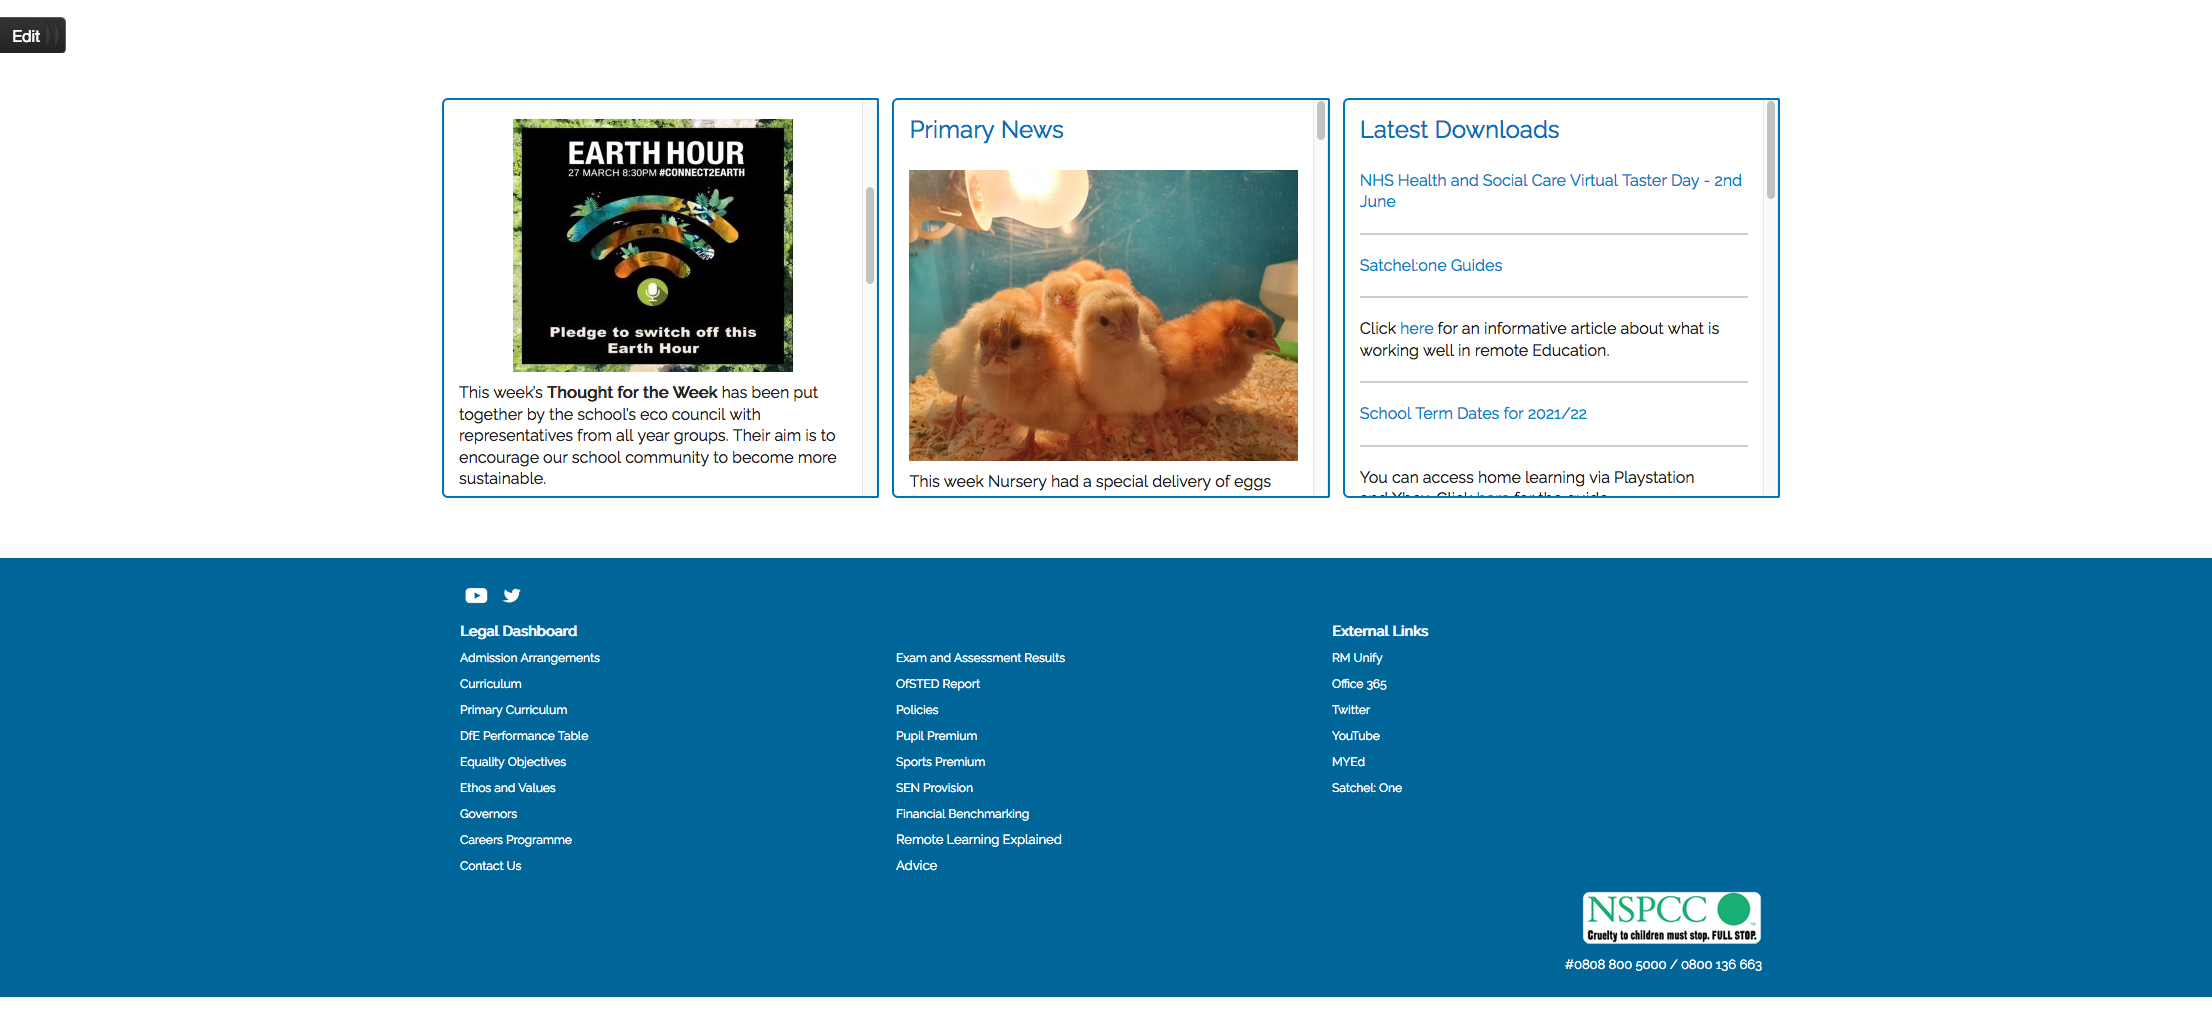
thanks for replying, sorry, I'm not great at explaining these things! I've attached 2 images, I'd like to create the webpage 'test 2', where the footer background colour is continuous for the full screen? It's currently published like 'test 1' (I've edited the image in Photoshop to try and help my explanation!)
Thanks
Chay
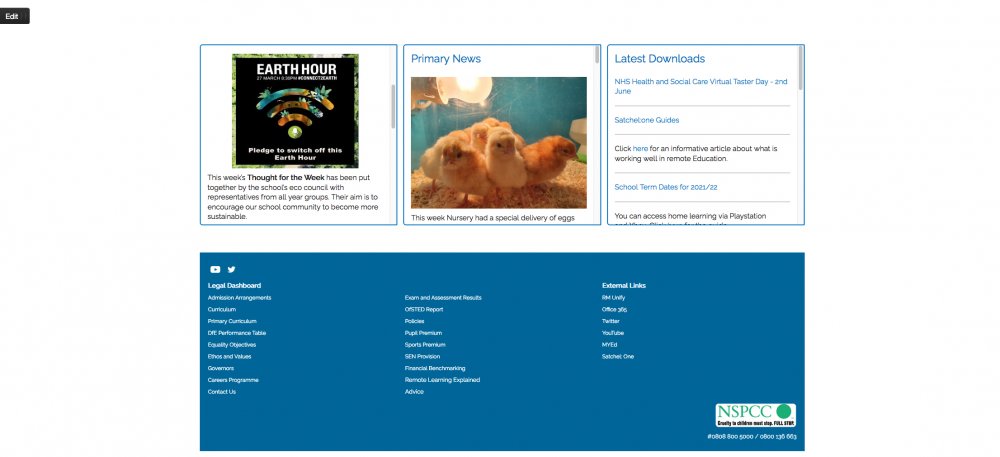
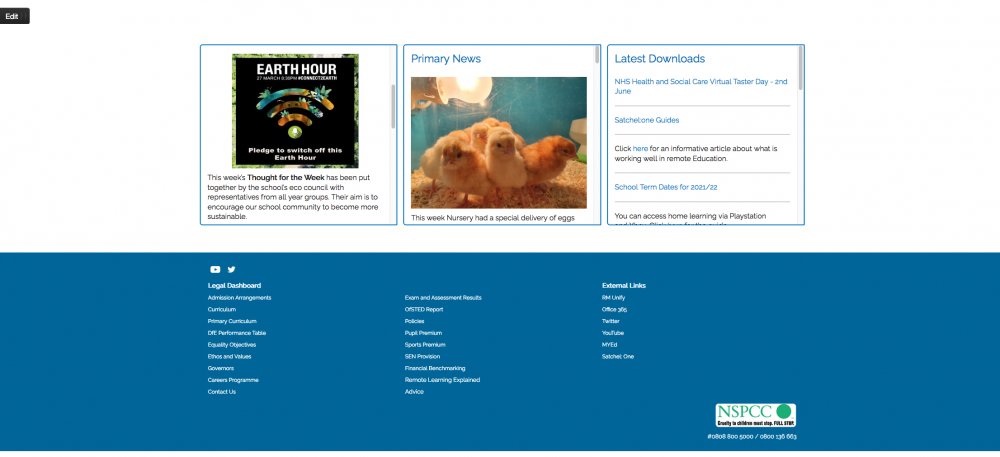
Hi @Chay,
That looks like you'd like a static footer at the bottom of each page. Are you using a custom theme already, I'd suggest we contacting our design team to amend the theme to include the footer. If it's a standard Frog theme, I can find out what it would cost for them to create a customised version with this footer. If you contact Amber, she'll arrange a quote.
I just had a quick attempt at styling with an HTML widget, but it's not simple and would potentially cause other issues.
-
17 hours ago, gbligh said:
Is there a way we could have a diary like feature for each day? Is there also a way they could all have a calendar, so staff could add events and meetings to student calendars?
The closest would be embedding the calendar app. Students can use this to make notes and events on their calendar and teachers can include events and meetings too.
-
 1
1
-
-
1 hour ago, Sue Busher said:
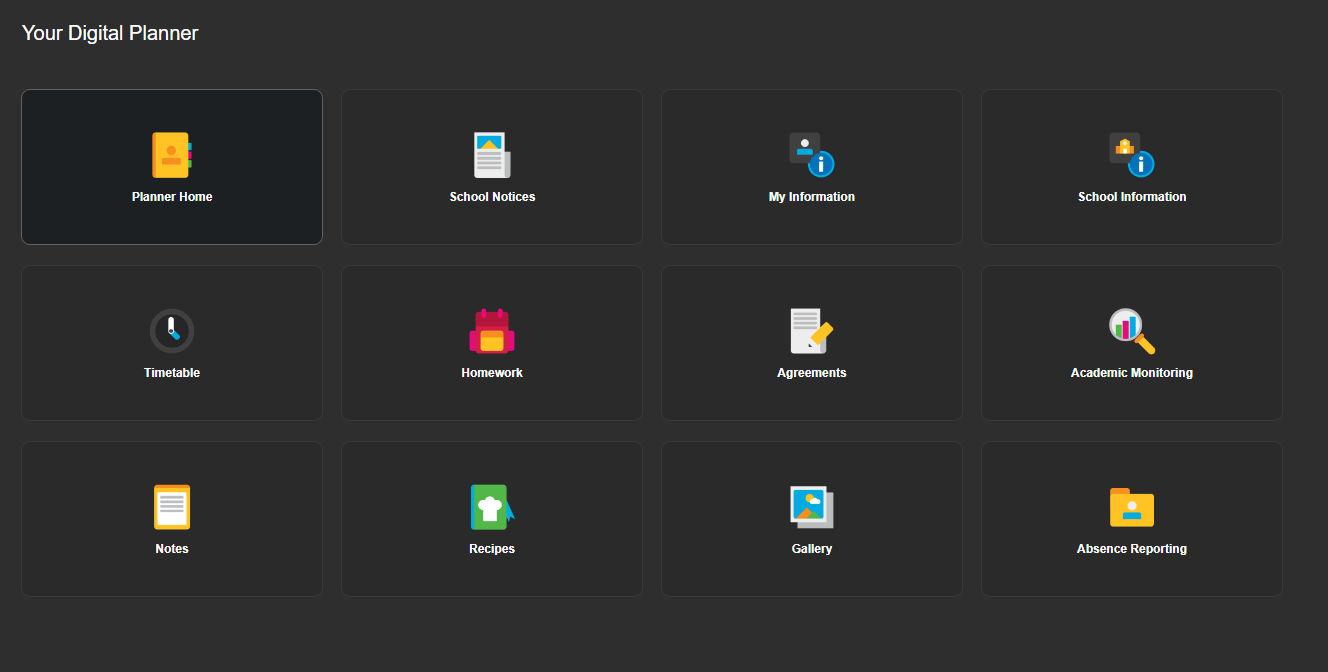
I was hoping that the experience would be a bit more like a planner, say tabs down the right which they could click on to go to that section. No offence to the designs already in Frog - a great start, but if it was a bit more interactive, I feel pupils would use it more effectively.
Hi @Sue Busher,
It's just a theme. The planners use the ePortfolio system to duplicate a site you create/we install, so you can set it out however you like.
Graham
-
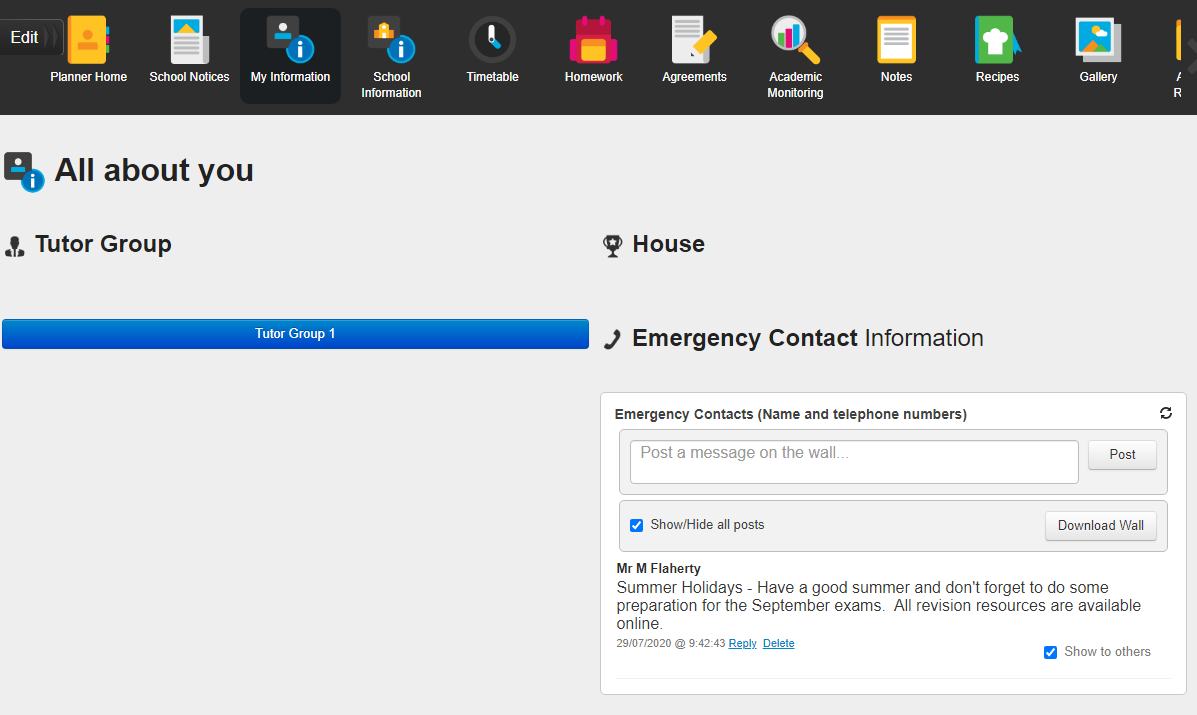
15 minutes ago, gbligh said:
We are also looking for a planner where students can add notes for each day etc. More like a diary I suppose
If you add a noticeboard or wall widget to page and the students have contribute rights, they can make notes quite easily. The Planner has notes and recipes pages for that purpose
-
16 hours ago, gbligh said:
We are looking to do this for sixth form so if anyone can share, that would be great.
Or if there is a solution already? @Graham Quince
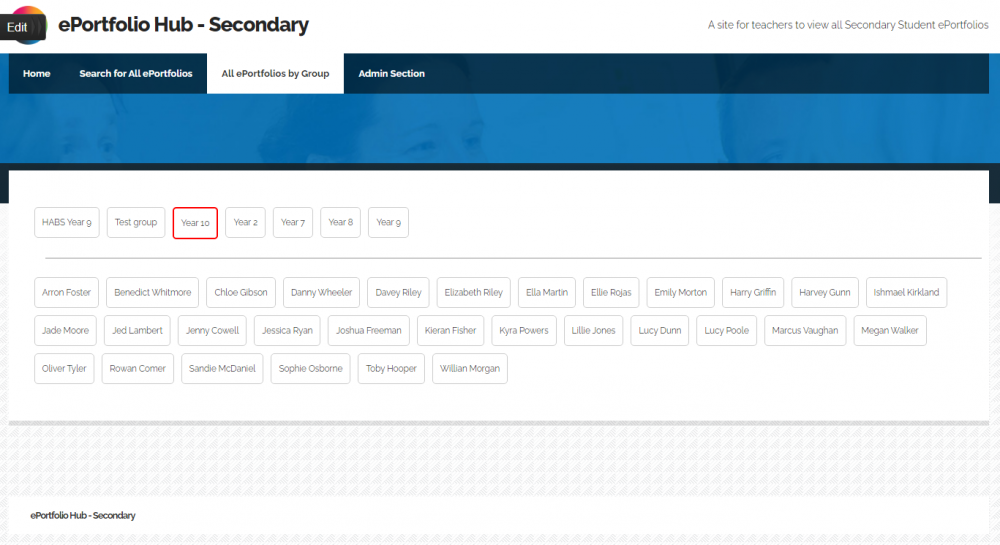
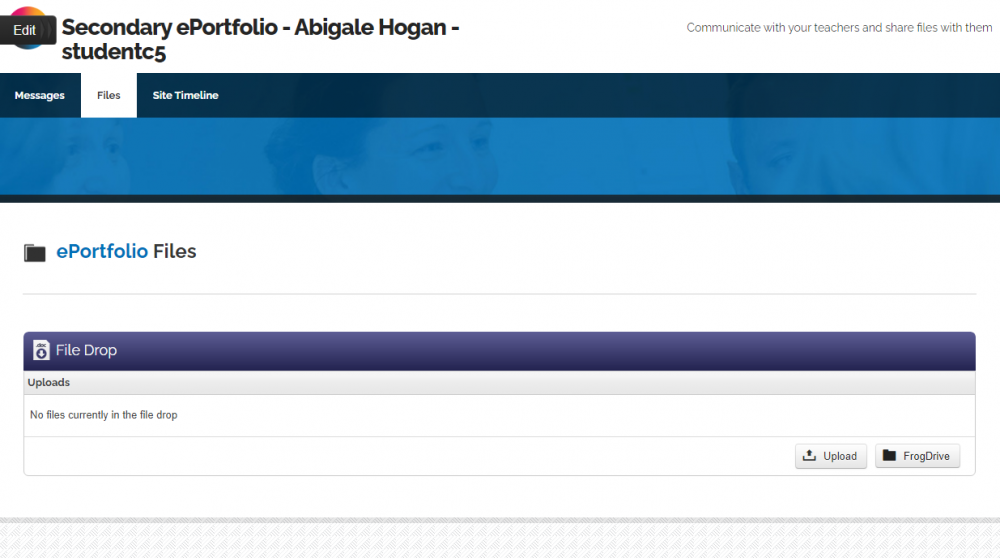
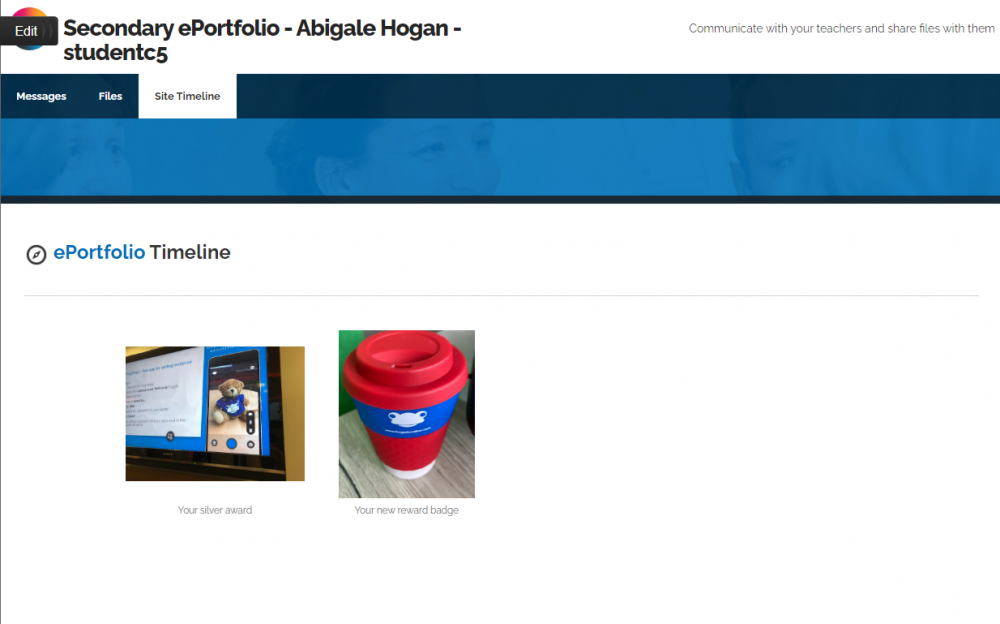
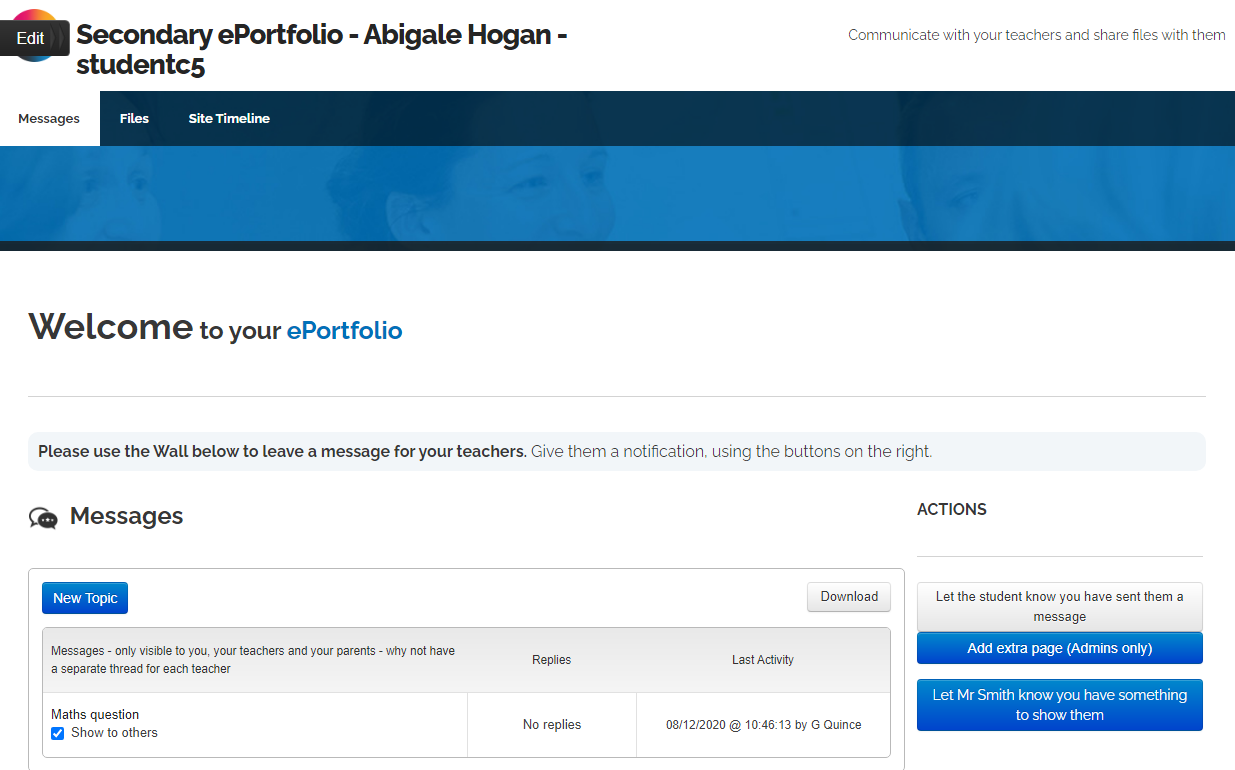
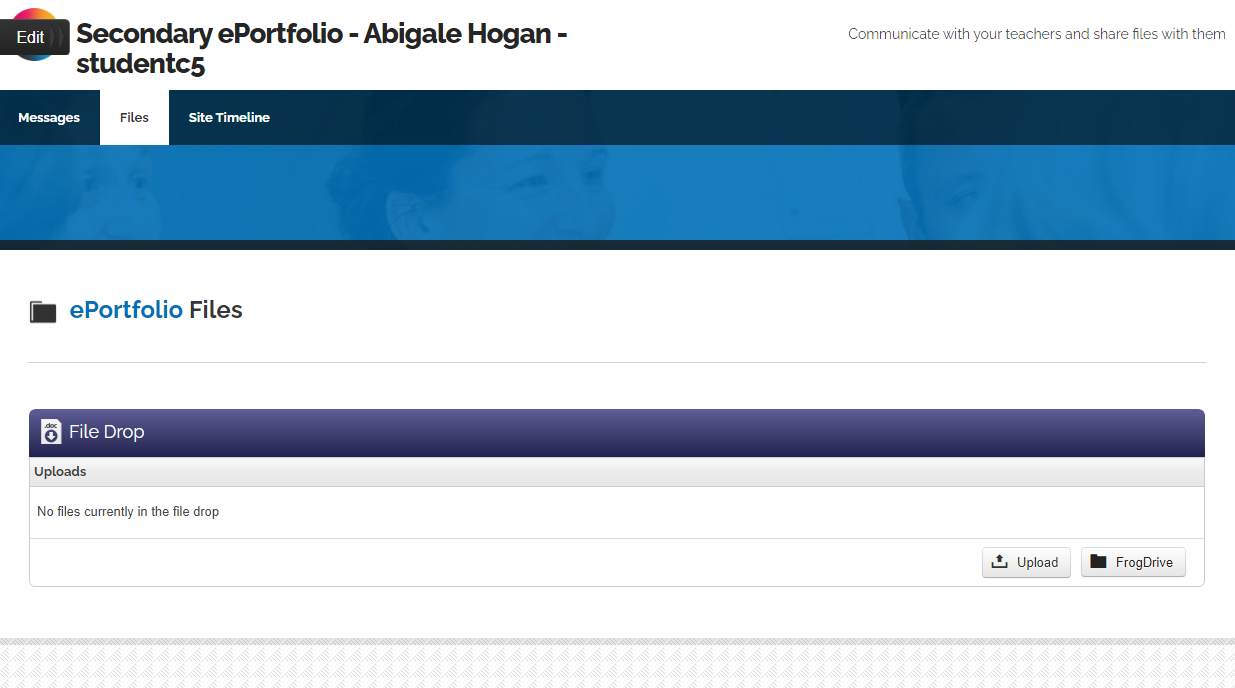
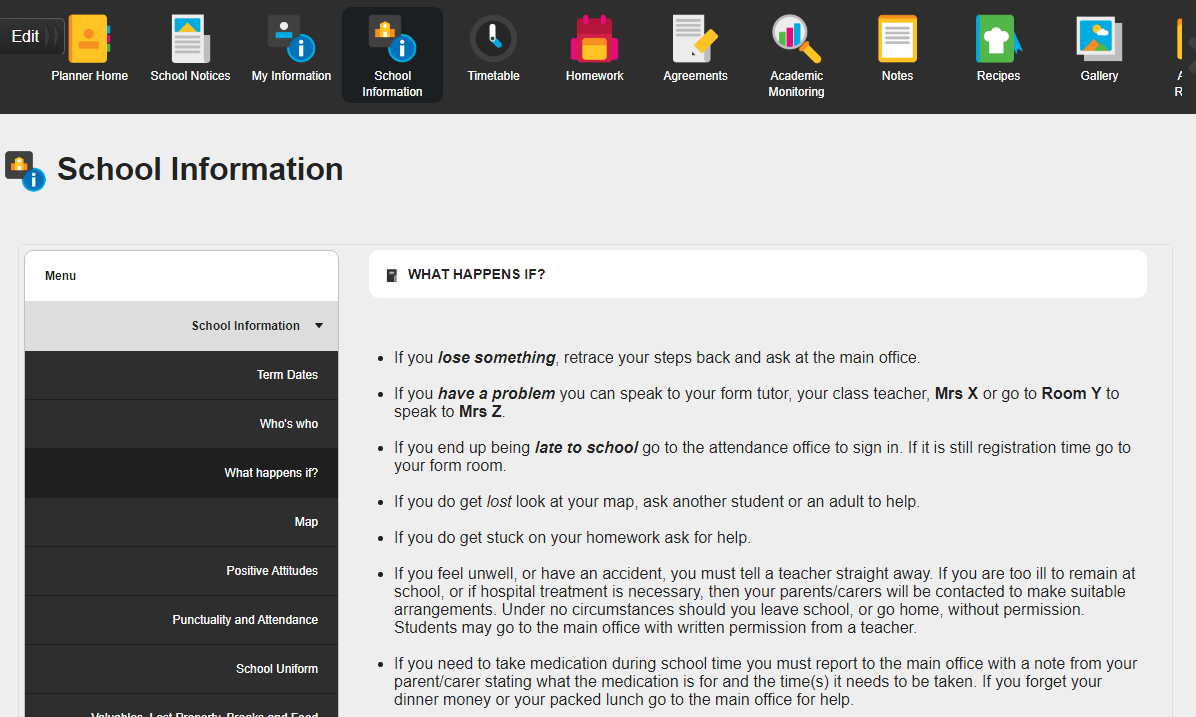
Hi @gbligh,
These are the screenshots for the newer secondary eportfolio, which focuses on students being able to upload work and then alert their teachers. It also has an Image Carousel widget set up with a keyword so that you can use it to send reward badges.

-
Hi @Sue Busher,
Here's screenshots of the Academy solution:
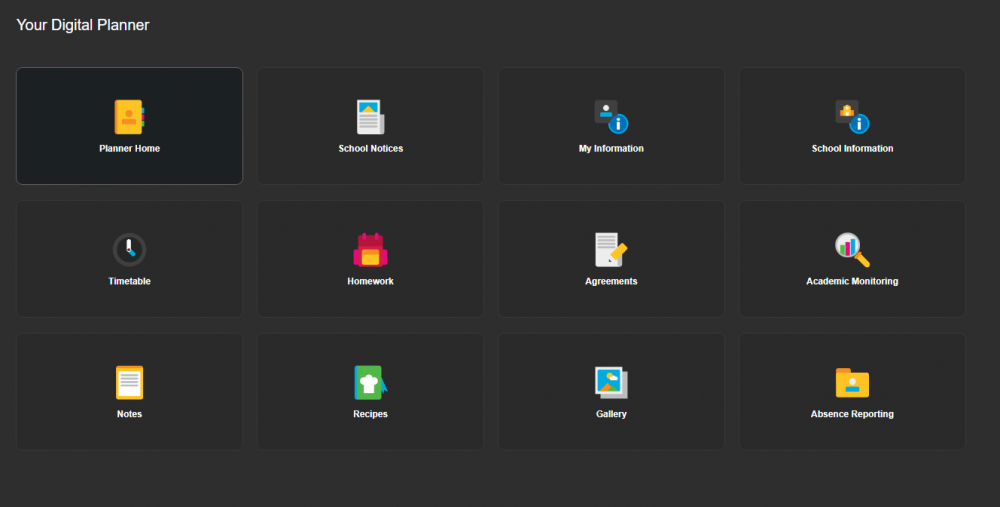

And here's a set of video guides for it:
https://www.frogeducation.com/community/training/digitalplanners
Since its launch, we've added more features, such as student comms and there's no need for the tutor groups now. Happy to have a call and talk you through it.
Graham
-
Inspired by Radclyffe school's forum search, here similar for searching for a notice. I was using a noticeboard as a way of sharing websites and needed a quick way to refine it:
<style>
    .searchnotices {
        border: 1px solid #CCCCCC;
        border-radius: 7px;
        padding: 15px;
        font-size: 16px;
    }

</style>
<div class="searchnotices">
    Search websites: <input type="text" class="notice-search" placeholder="Search for a link">
</div>

<script>
// div widget UUID that contains the forum
var noticeboardUUID = '048F190620028747CDCE4F6E1234D503E8CC344CFE08E98D';
var searchBox = arguments[0].find('.notice-search');
searchBox.on('keyup', function(){

    var searchTerm = searchBox.val().toLowerCase(),
        notices = $('div[data-content-uuid="' + noticeboardUUID + '"]').find('.notice-table');

    $.each(notices.find('.topic-row'), function (key, notice) {
        if ($(this).text().toLowerCase().indexOf(searchTerm) > -1 || searchTerm.length < 1) {
            $(this).show();
        } else {
            $(this).hide();
        }
    });
});
</script>
Radclyffe's original version for searching forums: https://www.frogeducation.com/community/training/html-tutorials/searching-forums
-
@ADT
I've updated the code above. Can you give it another go please?
Graham
-
oh I see, it's been pushed off the page.
-
19 hours ago, ADT said:
Why doesn't it show where the criteria labels have been put on the work when you print?
1. You have achieved this criteria here....... whoops it doesn't show!
Oh? it should. Can you post a screenshot? I know the labels aren't perfectly lined up.
-
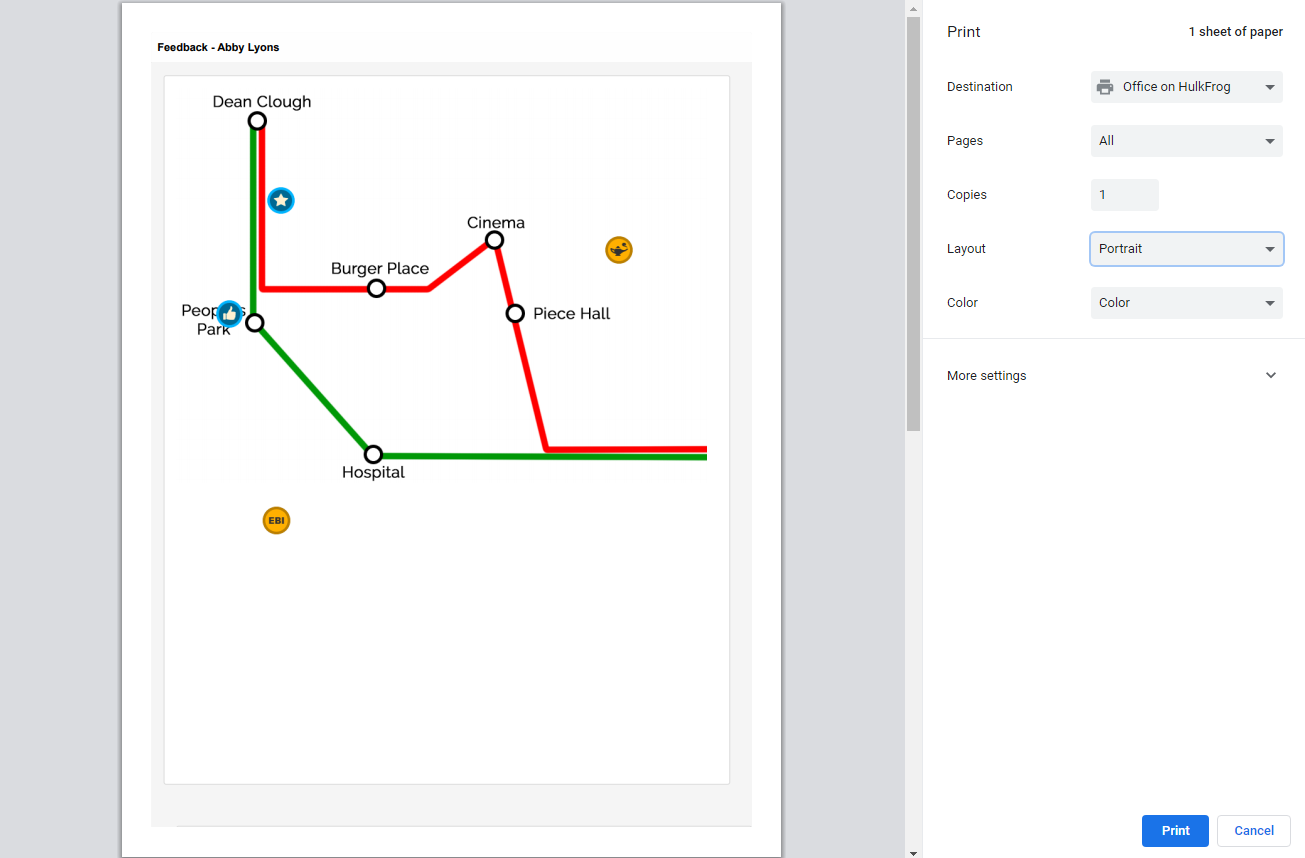
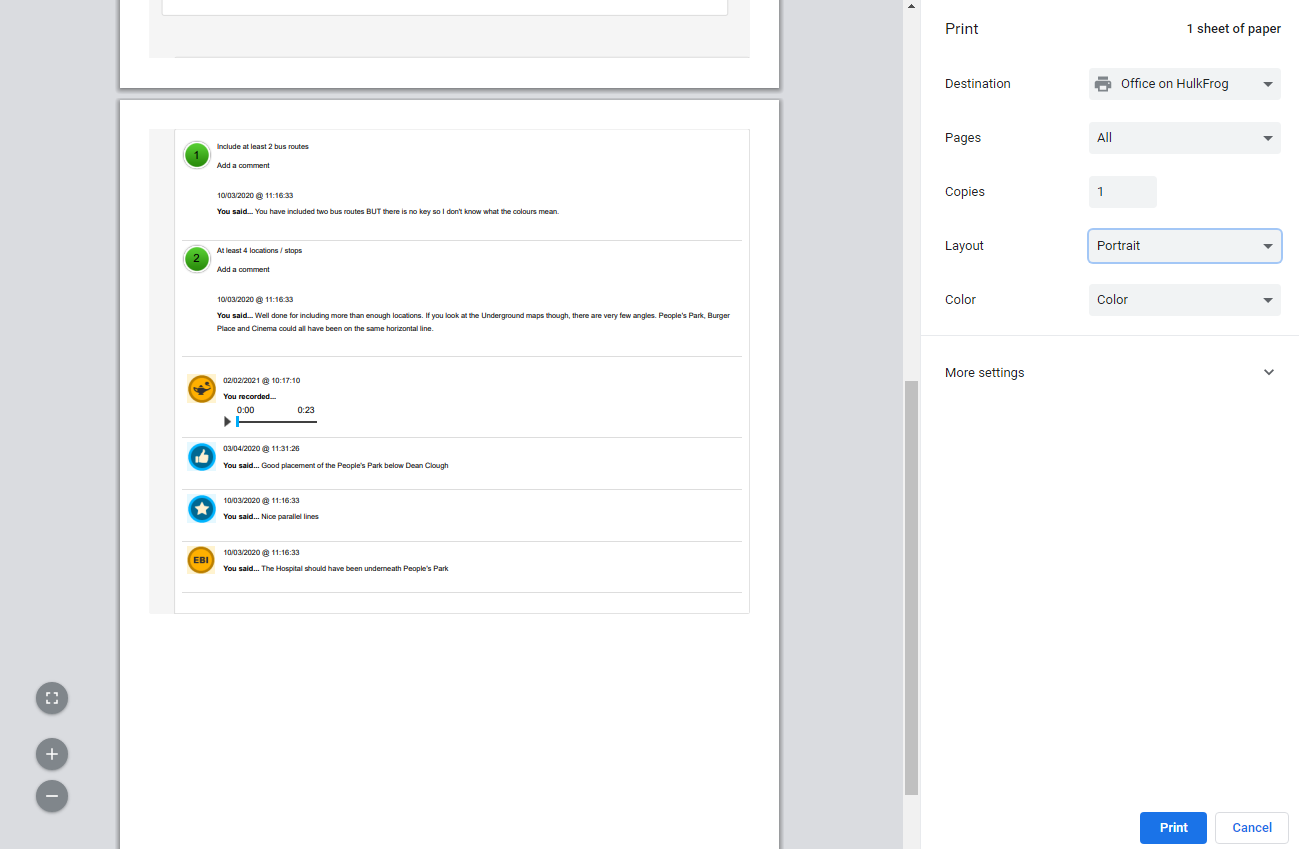
Just experimenting, but I've added CSS to target some classes in Feedback, so that when sent to the browser's print options, the picture, labels and comments all appear:
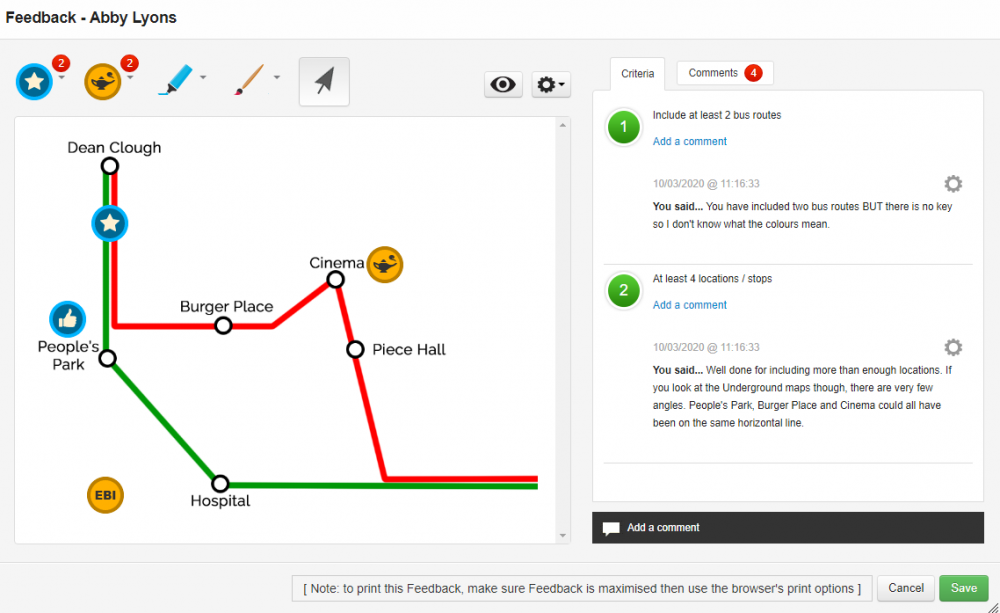


<style>
@media print {
    .feedback_toolbar_core,
    .feedback_toolbar_feedback_actions,
    .feedback_tabs_comments_bottom,
    .app-feedback .modal-footer,
    .app-feedback .nav-tabs,
    .comment-controls {
        display: none !important;
    }
    .app_feedback,
    .app_feedback .feedback-image-wrapper {
       padding: 0px !important;
    }
    .feedback_document_core {
        width: 100% !important;
        float: left !important;
        height: auto !important;
    }
    .feedback_sidebar_core {
        width: 100% !important;
        float: none !important;
        page-break-before: always;
        margin-left: 0px !important;
    }

    .canvas-drawing-wrapper,
    .feedback-sticker-container {
        transform: scale(0.9) !important;
        top: -80px !important;
        left: -65px !important;
    }

    .feedback_tabs_criteria,
    .feedback_tabs_comments {
        height: auto !important;
        display: block !important;
        opacity: 1 !important;
    }
    .app_feedback .document-scroller {
        overflow: hidden !important;
        top: -150px !important;
        left: -150px !important;
    }
}

.app-feedback .modal-footer::after {
    content: "[ Note: To print this Feedback, make sure Feedback is maximised, the document is at the top, then use the browser's print options ]";
    display: inline-block;
    padding: 4px 12px;
    margin-bottom: 0;
    font-size: 14px;
    line-height: 20px;
    color: #333;
    text-align: center;
    vertical-align: middle;
    background-color: #f5f5f5;
    border: 1px solid #ccc;

}
</style>
It'll need some experimentation and real-world testing, if anyone would like to help out.
Graham


Assignment Wizard display vertically in a single frame (no tabs)
in Coding
Posted
I've had a couple of schools who have expressed a preference for the assignment wizard to list all the sections one after the other, instead of in tabs.
This is possible by adding the following CSS to an HTML widget on the staff dashboard:
After hiding the tab buttons, the CSS forces each section to have a minimum height and stack under each other. They can still expand as you add more activities and resources.